
Photo Mechanic solves the problem of managing large photo libraries without the bloat of a full editor. It focuses on speed: browsing, sorting, and editing metadata before you ever open a pixel editor. For a newcomer, these are the first things worth trying.
How do I sort and search photos?
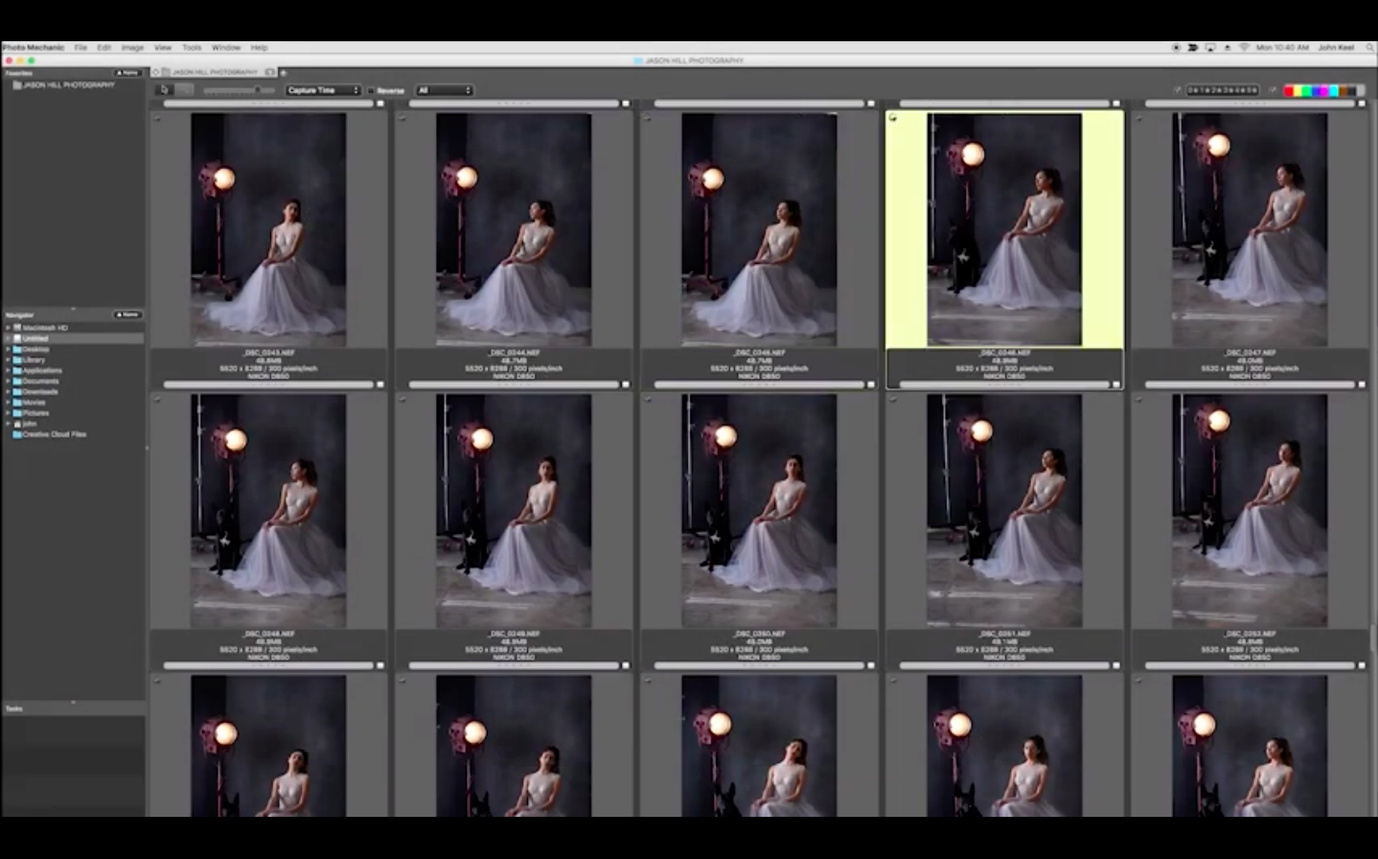
Use the sort and search tools to filter by date, camera, or keyword. Color marking helps you flag keepers and rejects at a glance, so you can cull a shoot fast.
How do I inspect technical details?
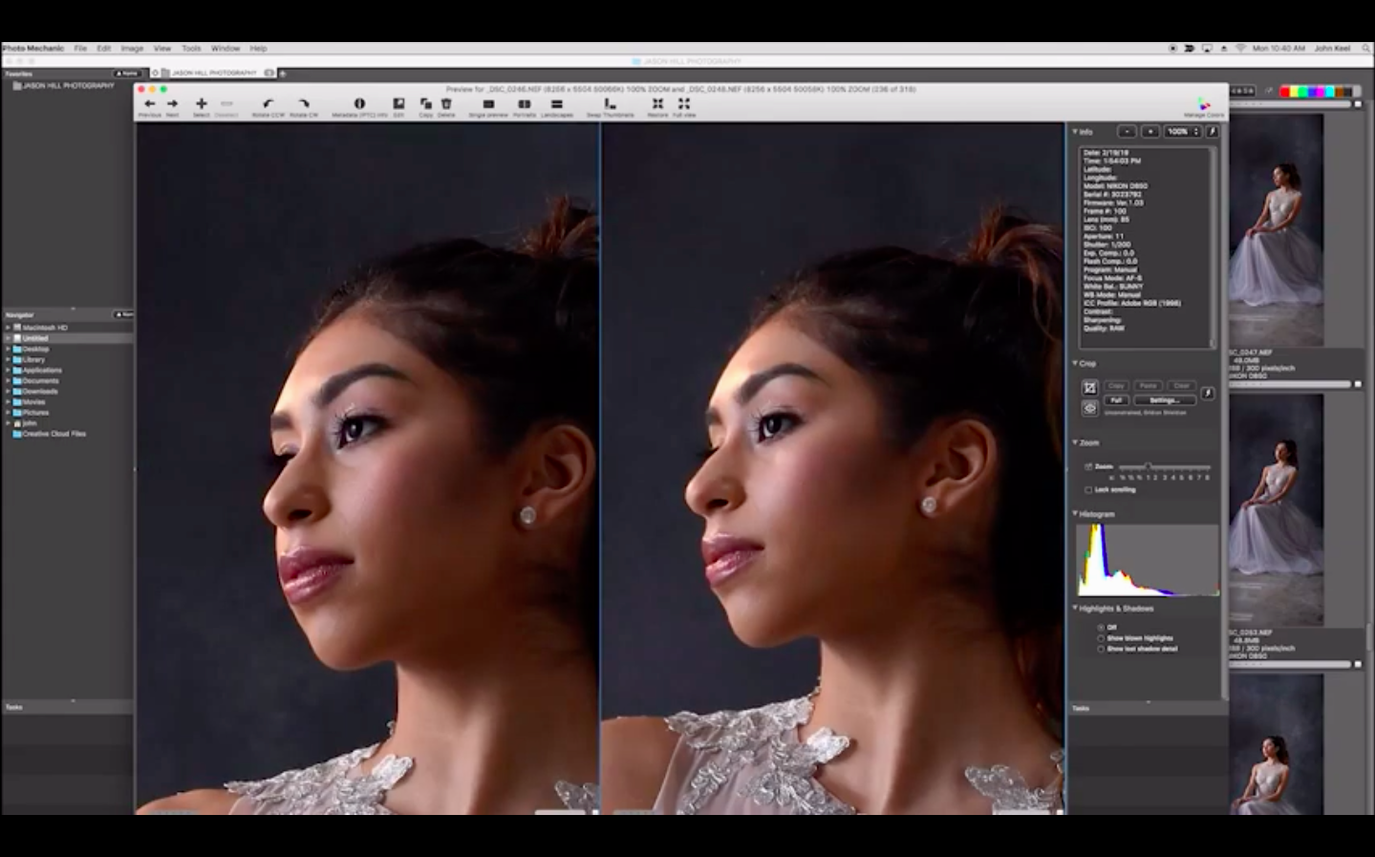
Open a photo and check the technical panel for lens, shooting parameters, camera model, focus mode, and white balance. You can also edit the date and time created if the camera clock was off.
What about sending photos out?
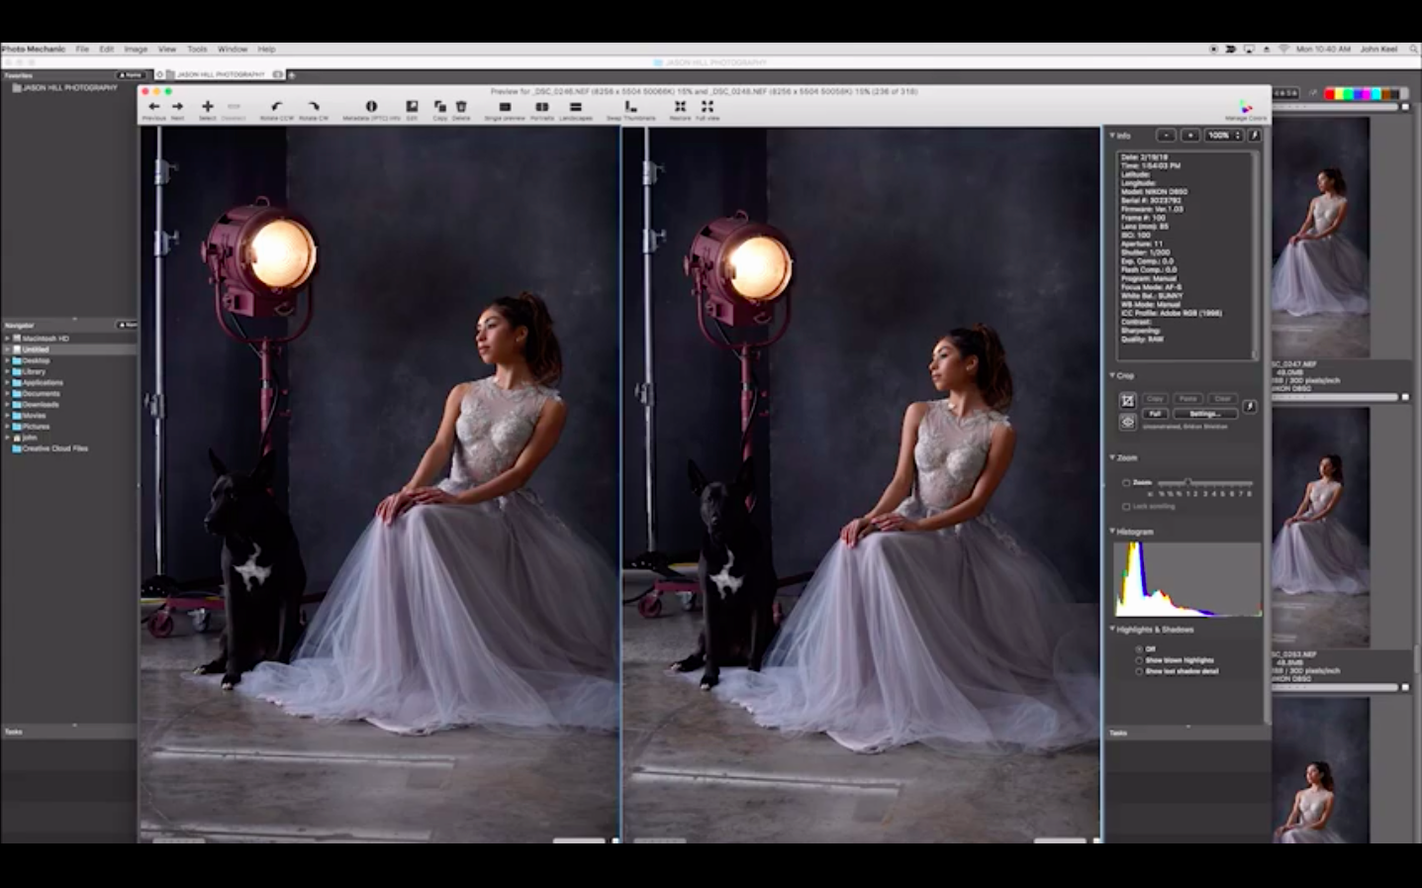
Photo Mechanic can upload to an FTP server directly from the app, optimize images for web use, or print copies. For side-by-side comparisons, use the comparison view to check two shots before deciding which to keep.
Works with RAW files from newer cameras
One common concern is whether Photo Mechanic works with RAW files from newer cameras. The app reads the embedded JPEG preview from any RAW file, so you can browse and cull without waiting for full-decoded previews. Metadata editing is applied directly to the sidecar XMP file or embedded in the RAW, depending on your camera's format. Another question: does it replace a photo editor? No. It handles ingestion, rating, keywording, and renaming. For exposure or color corrections, you still open Photoshop, Capture One, or Affinity Photo. People also ask if it handles video files. It can display thumbnails and basic metadata for video clips from most cameras, but it is not a video player or editor. The file management is non-destructive unless you explicitly use the rename or resize tools, so originals stay safe.
Adjust these preferences before culling a shoot
Before you start culling a shoot, adjust these preferences to match how you work.
Preview cache
Set the preview cache size to a value that fits your available RAM. A larger cache keeps more full-resolution previews in memory during grid scrolling, which reduces loading when you switch between photos.
Color class labels
Photo Mechanic assigns default color labels, but you can remap them to your own system. For example, map green to "Select" and red to "Reject." This makes the color bars in the thumbnail grid meaningful for your workflow.
Metadata templates
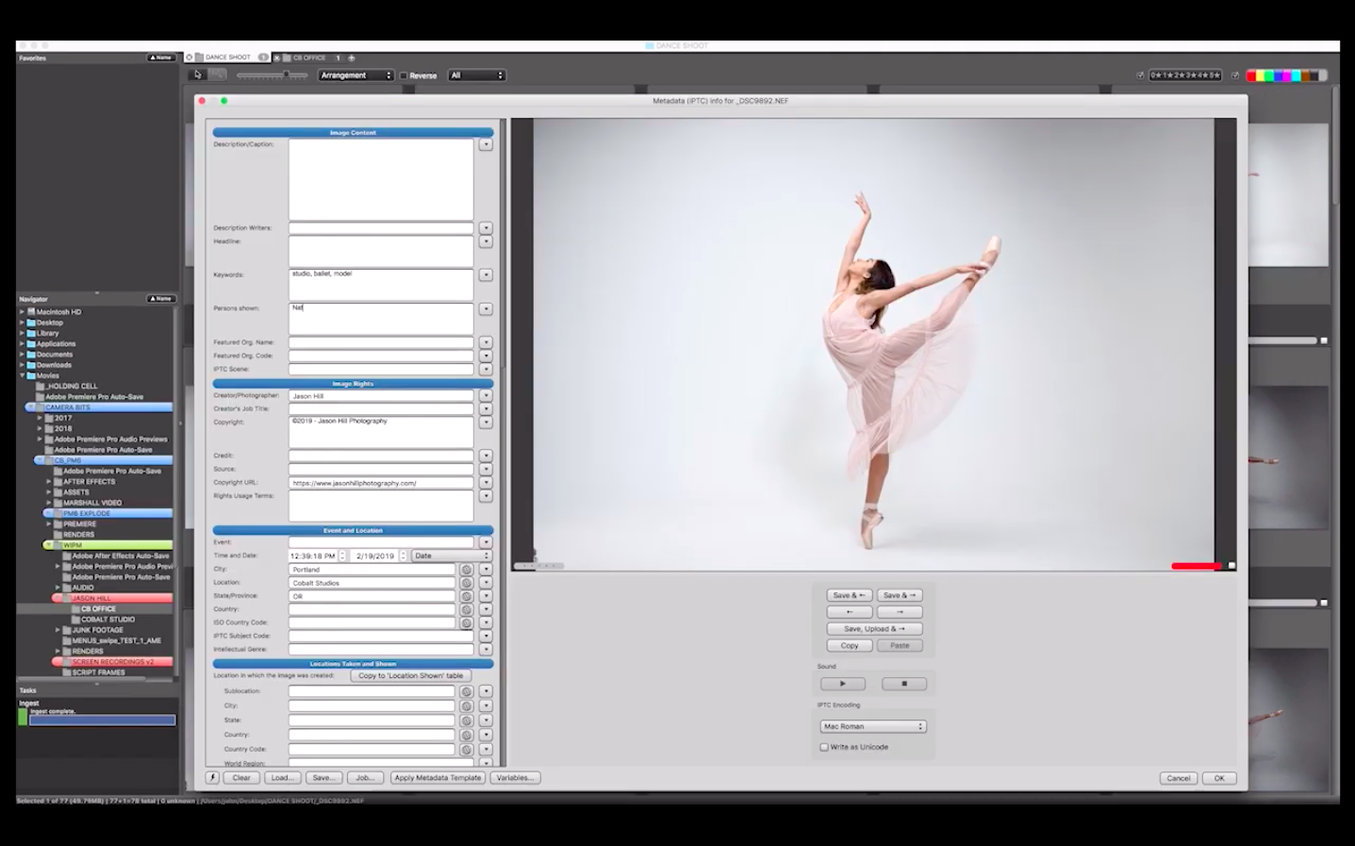
Create a metadata template with your default copyright, credit line, and contact info. Apply it to every ingested shoot so you never forget to embed your details before sending files out.
Keyboard shortcuts
Review the shortcut set for common actions like rating, color labeling, and advancing to the next photo. If you come from another browser, you can reassign keys to match muscle memory.
Scenario: a wedding photographer's first cull
After a full-day wedding, you have 2,500 RAW files on two memory cards. You need to deliver a proof gallery to the couple by tomorrow. Here is how Photo Mechanic gets you there without opening a full editor.
Insert the first card. Photo Mechanic ingests the files to a folder named by date and event, automatically renaming them to a consistent sequence. During ingestion, it can also copy to a backup drive. Once the files appear in the contact sheet view, you start culling. Thumbnails populate almost immediately, even at high zoom ratios. You move through the grid with the arrow keys, applying a 1-star rating to keepers and a 5-star rating to favorites for the highlight reel. Color marks flag shots that need white balance correction later. The side-by-side comparison view handles tricky picks where you need to see two near-identical poses at full resolution. For the final deliverable, you select the 4-star and 5-star images, resize them for web, and use the FTP upload feature to send them straight to the proof gallery site. The whole cull, from card insertion to upload, takes about an hour instead of four.
Start with ingest, then navigate and cull in contact sheet view
Open Photo Mechanic. The workspace defaults to a contact sheet view showing thumbnails of the folder you last browsed. Navigate to a new shoot folder in the file tree on the left.
Step one: ingest. If photos are still on the card, use the ingest dialog. It copies files to your chosen destination, applies a rename template, and can create a secondary backup copy. The dialog shows estimated transfer time based on file count and size.
Step two: cull. With the contact sheet populated, use the arrow keys to scroll. Tap the number keys to assign a rating from 1 to 5. Press a letter key for a color class. The thumbnail border changes color instantly, so you see your picks at a glance. Filter the grid to show only images with a rating above 2, hiding the rejects.
Step three: add metadata. Select the keepers and open the metadata editor. Fill in the title, description, and keywords. Apply your pre-made metadata template to add copyright and contact info. You can also add GPS coordinates by importing a GPX track from your phone or dedicated logger.
Step four: export. Choose the images you want to send out. The export tool can resize, rename, and convert to JPEG in one pass. For FTP delivery, configure the server settings once and save the profile for reuse. The upload queue runs in the background while you continue working on the next folder.
Step five: final review. Switch to full-screen mode and step through the exported JPEGs. Use the comparison view to confirm no duplicates slipped through. Close the session.
Don't drag files to reorganize in the contact sheet grid
New users often treat the contact sheet grid like a Finder window and try to drag files around to reorganize folders. Photo Mechanic does not move files by drag-and-drop in the grid. Use the rename and move tools instead if you need to reorganize on disk.
Another common mistake is ignoring the ingest dialog and copying files manually. That skips the automatic rename and backup copy features, which are the main reasons Photo Mechanic saves time on import. Manual copy also loses the opportunity to embed metadata during ingestion.
People also apply metadata to single images when they could apply it to a whole selection. Select all 200 keepers, edit metadata once, and the changes propagate to every selected file. Doing it one by one defeats the speed advantage.
Some beginners forget to set the preview cache size and wonder why scrolling slows down after a few hundred images. The default cache is conservative. Bump it up if you have available RAM and work with large shoots.
Finally, using the crop or resize tools without first making a backup can cause trouble. These tools modify pixel data. Keep a copy of the original RAW files before you apply any destructive operation, even if you only plan to resize for email.
- macOS 13 or later
- Apple Silicon
Questions from the notes
Can Photo Mechanic import GPS coordinates?
Yes, it can import GPS coordinates into your photos' metadata.
Does Photo Mechanic have a full-screen mode?
Yes, it includes a full-screen viewing mode for distraction-free review.
Is there a related product?
Photo Mechanic Plus is a related product from the same developer, adding catalog features.
Install procedure
- Mount the downloaded disk image.
- Drag the app to the Applications folder alias.
- Launch the app after copying is complete.
Reports from players
Sign in or create a tester account to file a report.
No reports filed yet.