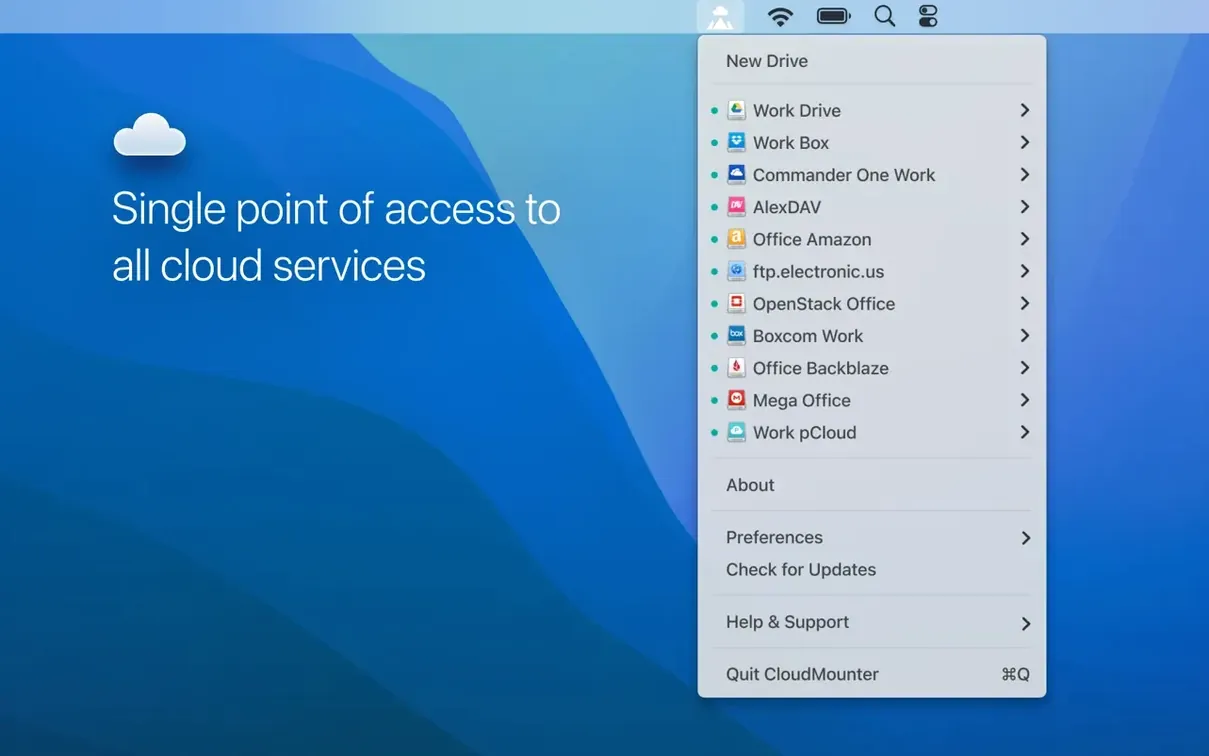
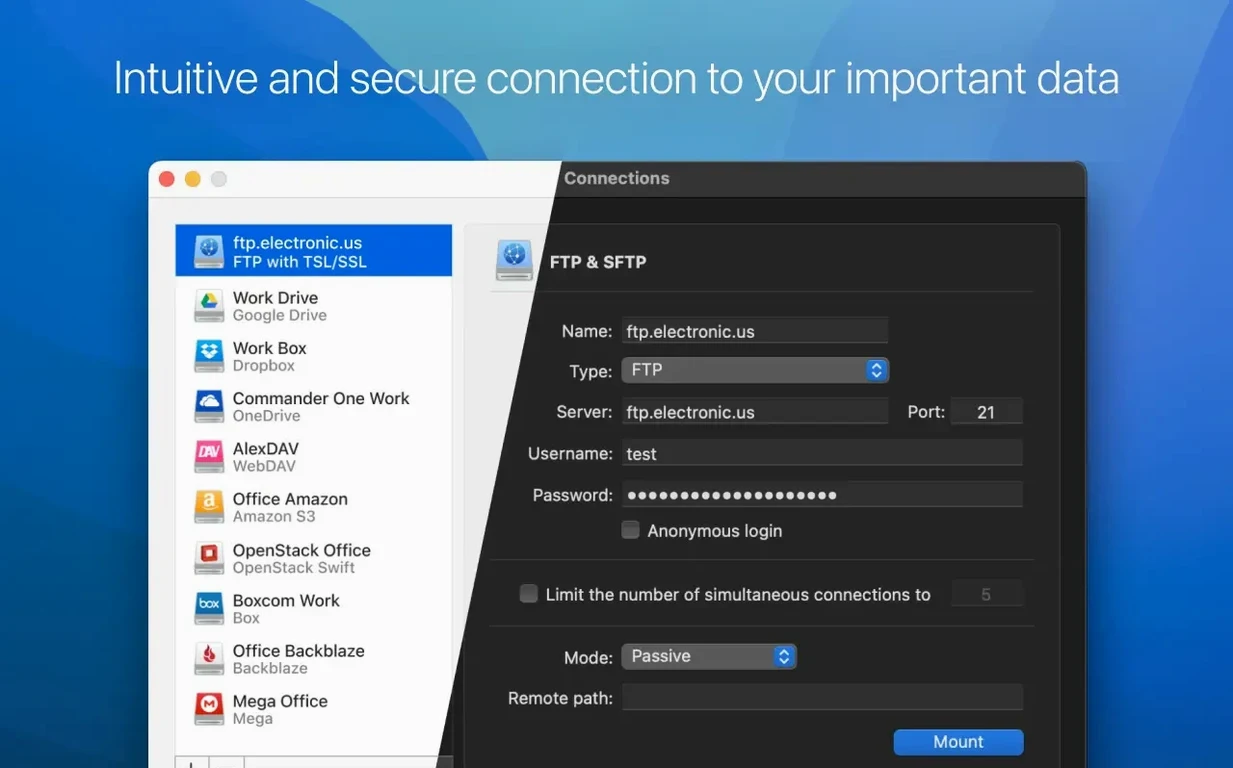
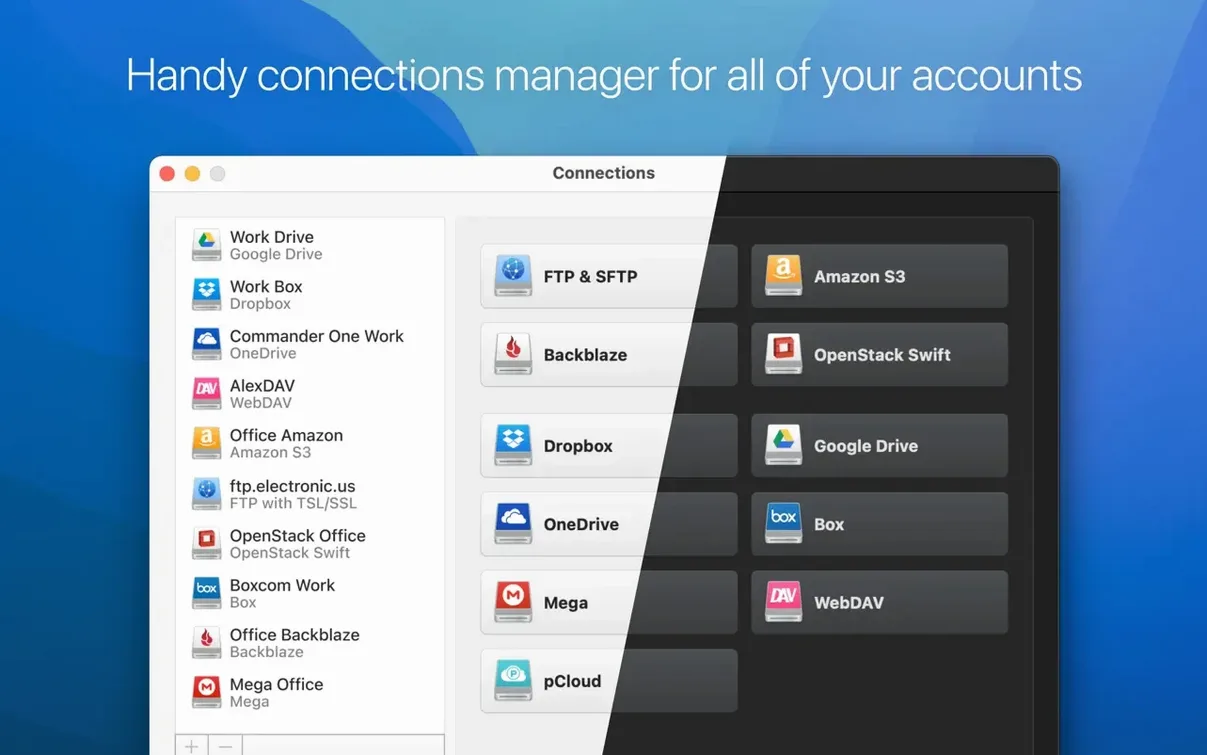
You have three Google Drive accounts, a Dropbox team folder, and an SFTP server that holds the project archives. Instead of logging into each web interface or running three sync clients, you mount them all as local drives in Finder. That is the core of CloudMounter, and for an experienced user the interesting part is what happens after the mount.
The app handles multiple cloud accounts in one window, so you can keep work and personal storage separate without switching apps. Files appear as ordinary folders, which means you can open, edit, and save directly from any application that uses the standard file dialog. The MEGA connection has been improved in this release, and uploading large files is faster — both changes matter if you move big media files around regularly.
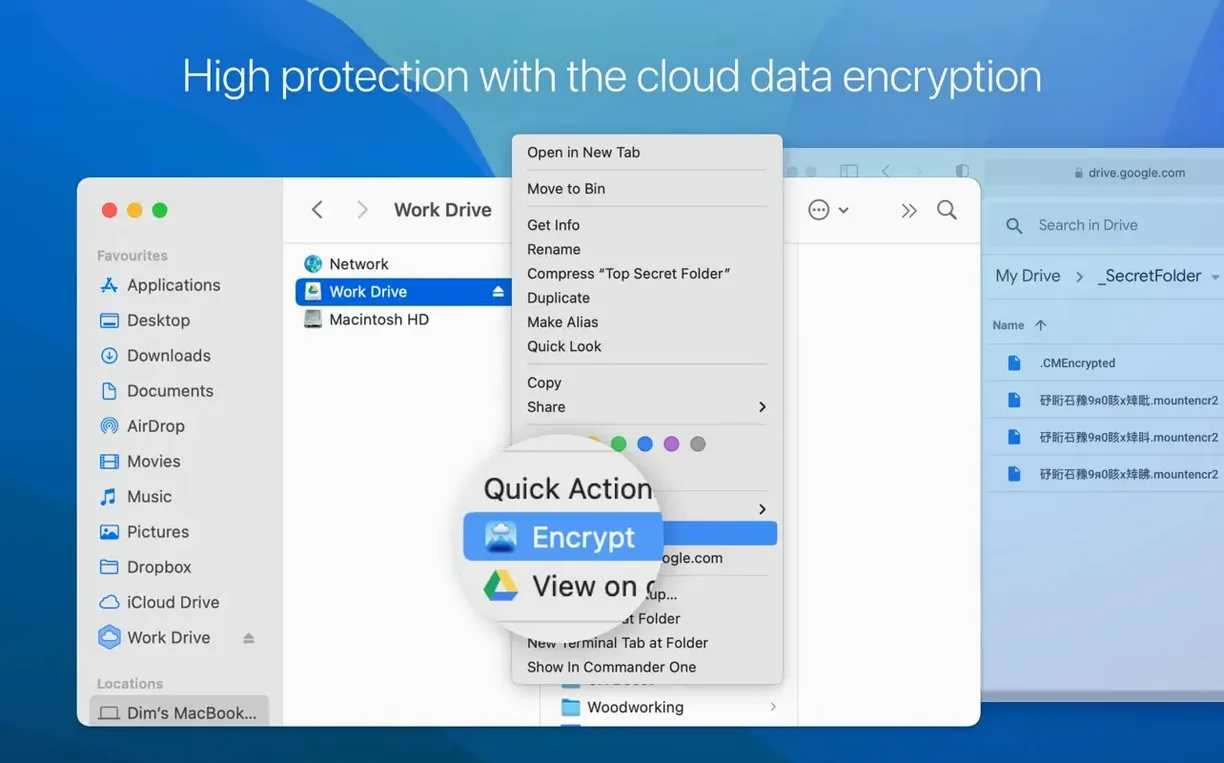
For security-sensitive work, CloudMounter can encrypt cloud data with AES-256 before it leaves your Mac. That is useful when the cloud provider's own encryption is not enough for your threat model. The Finder integration covers the whole workflow: you see storage usage inline, and the recent fix for displaying that info on online connections keeps the numbers honest.
Version 4.18 also fixed download cancellation on SFTP and file downloading issues when the cache volume changes. Small fixes, but they are the kind that stop an afternoon of wasted transfers. The interface is available in eleven languages, including English, German, and Japanese, so the tool fits into a multilingual team without extra configuration.
CloudMounter keeps its account list simpler than ExpanDrive
ExpanDrive is the closest competitor. Both mount cloud storage as local drives in Finder, but ExpanDrive handles more enterprise services and includes SSH gateway features. The AES-256 encryption at the file level is a feature ExpanDrive only offers in its higher tier.
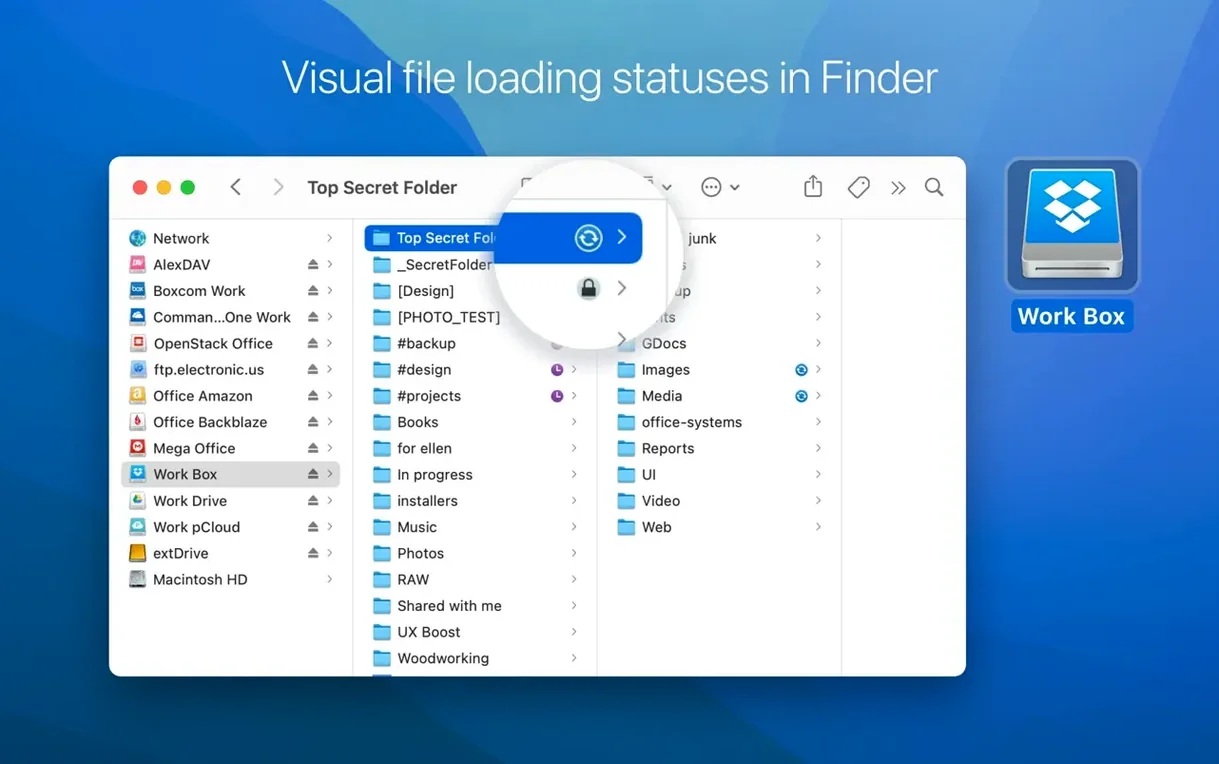
Mountain Duck also does the same job with a focus on cyberduck-style interfaces. It supports FTP, SFTP, and WebDAV alongside cloud storage, but its interface is more about individual bookmarks than a unified dashboard. CloudMounter groups accounts by service type and shows status icons for transfers, uploads, and moves, which Mountain Duck buries in a separate log panel. Neither app syncs files to the local disk automatically, so the comparison comes down to interface preference.
For users who stick to FTP and SFTP only, classic apps like FileZilla or Transmit are lighter. But once you need a mix of cloud and remote protocols, CloudMounter avoids switching between tools. It does not replace a full FTP client for batch operations, but it covers daily file access without extra software.
Change the cache location to an external drive before transferring large files
When you first launch CloudMounter, the default cache location is inside the application data folder. If you work with large files regularly, change the cache volume to a dedicated external drive or a secondary internal disk before you start transferring. This avoids filling your boot drive with temporary copies and makes the cache volume change fix in version 4.18 meaningful from the start.
The encryption toggle is another early stop. Even if you do not plan to use AES-256 for every connection, enable it on the accounts that handle sensitive documents so it is active without remembering to turn it on later. You can leave it off for casual services like a shared Dropbox folder where speed matters more.
- Set cache volume to a non-boot drive.
- Enable encryption on accounts with sensitive data.
CloudMounter runs as a background process while drives are mounted
Does CloudMounter need to stay running all the time? Yes, the app runs as a background process while its drives are mounted. You can unmount everything and quit when you are done, but the Finder integration only works while the application is active. If you quit it, the mounted drives disappear.
Can I access the same cloud account from both CloudMounter and the official sync client? Yes, but avoid writing to the same files from both simultaneously. CloudMounter does not sync to local disk, so conflicts are rare, but simultaneous writes can cause version conflicts on the server side. Stick to one client for active editing and use the other for reading or quick access.
Do I need an activation code or a crack to use it after installing? The version available here is pre-activated by the TNT team. No serial key or license file is required. If you search for CloudMounter activation code or CloudMounter crack elsewhere, you will find the same release. The application launches ready to mount on first run.
Status icons show transfer progress next to each mounted drive
The status icons next to each mounted drive show transfer progress, upload status, and move operations in real time. When you drop a large file into a mounted folder, the icon changes to indicate activity without opening any separate progress window. This is faster than checking a log.
Storage usage for each online connection is displayed right in the account list. The version 4.18 fix corrected how that number refreshes, so you see current available space without refreshing manually. Useful when you are about to move a batch of files and want to confirm enough room exists.
The interface language is set during first launch but can be changed in preferences without restarting the app. If you share the machine with someone who prefers French or Japanese, switching takes about ten seconds. No logout required.
- Improved uploading of large files.
- Improved work with MEGA connections.
- Fixed download cancellation for files on SFTP connections.
- Fixed file downloading issues when cache volume is changed.
- Fixed displaying of storage usage information for online connections.
- macOS 10.14 or later
- Intel architecture
Questions from the notes
Can CloudMounter mount multiple cloud accounts at once?
Yes, CloudMounter supports multiple cloud accounts in one application, letting you access all of them as local drives in Finder.
Does CloudMounter encrypt data stored in the cloud?
CloudMounter can encrypt your cloud data with AES-256 before it is uploaded.
Install procedure
- Mount the disk image and run Open Gatekeeper friendly.
- Press Enter in the Terminal window to bypass Gatekeeper.
- Drag the app into the Applications folder.
- Launch the app when installation is complete.
Reports from players
Sign in or create a tester account to file a report.
No reports filed yet.