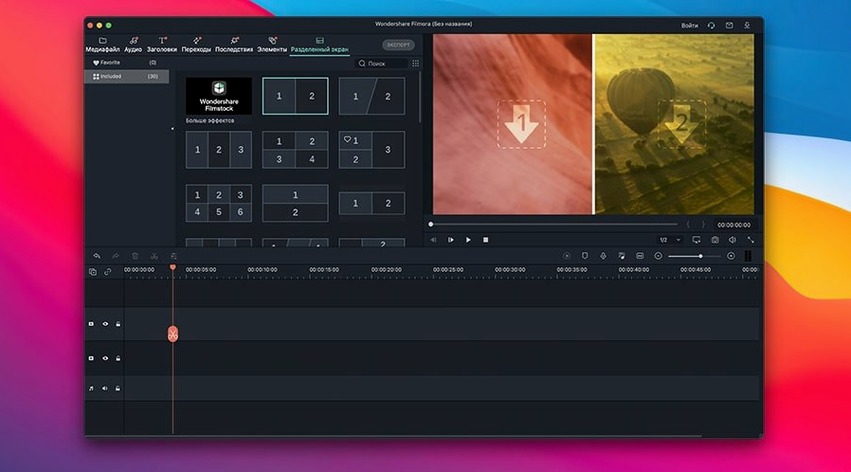
Filmora 14.8.17 supports macOS 10.14 and later, and the interface comes in 16 languages including Russian. That's a wide compatibility net for a Mac video editor from Wondershare.
Cut, trim, and merge clips with AI denoise improvements
- Cut, trim, and merge video clips on a timeline.
- Export finished projects in multiple formats to your computer.
- Upload directly to popular internet services.
- AI Denoise improvements and NewBlueFX optimization, as noted in the release notes for version 14.8.10.
Stable cutting and exporting remain the core workflow
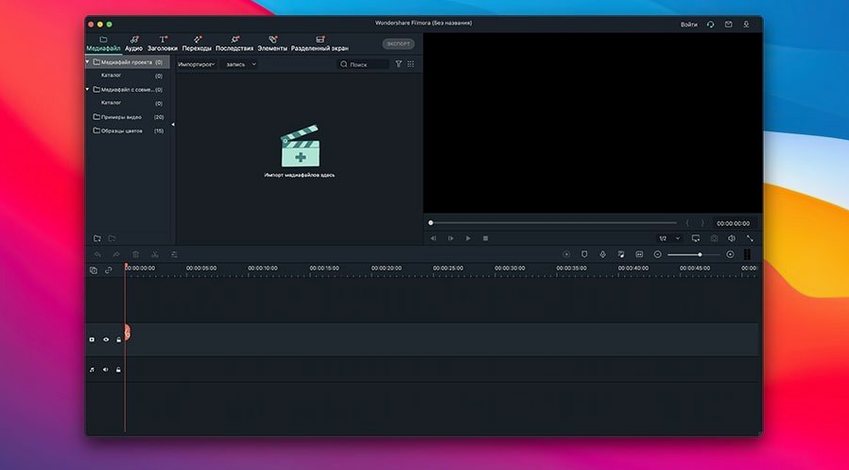
The core workflow hasn't changed: import media, edit on a timeline, export. Version 14.8.17 doesn't list specific changes beyond the earlier tweaks, so the focus remains on stable cutting and exporting rather than a redesigned interface. If you need a straightforward editor that handles common tasks without a steep learning curve, this version keeps that promise.
What changed between 14.8.10 and 14.8.17
Version 14.8.10 brought AI Denoise improvements and NewBlueFX optimization. Version 14.8.17 follows without its own listed changes. In everyday use, that means the denoise tool handles grain reduction a bit better than earlier 14.x builds, and the NewBlueFX transitions and effects render with fewer dropped frames during playback. For someone editing HD footage, those are the two areas where you notice the difference: less time waiting for effects to render, and cleaner results when cleaning up noisy clips from older cameras or low-light shots.
Runs on macOS 10.14 through macOS 26 on Intel and Apple Silicon
Filmora runs on macOS 10.14 through macOS 26, and supports both Intel (x86) and Apple Silicon (M1 through M4) architectures. That covers every Mac sold in the last decade, from a 2016 MacBook Pro on Mojave to a 2025 iMac on the latest macOS. The installer process hasn't changed: mount the disk image, drag the app into Applications, open it once, quit, and it's ready. No additional components to download, no command-line steps.
On an Intel Mac, expect the interface to feel responsive for cutting and trimming standard HD clips. Export times depend on your hardware, but the app itself doesn't demand a high-end GPU. On Apple Silicon machines, the binary runs natively (ARM architecture is listed), so there is no Rosetta translation overhead. The AI Denoise feature may be the one task where M-series chips show an advantage, but the app works on both architectures equally for the rest of the workflow.
Scenario: a YouTuber editing weekly gameplay clips
Say you record 20-minute gameplay sessions at 1080p. You want to cut out the downtime between matches, add a title card, and upload to YouTube. In Filmora, you import the raw file, split it at the points where the action stops, delete the unwanted segments, and drag the remaining clips together. The title tool handles text overlays in a few clicks. Export to YouTube is a built-in option, so you skip the intermediate file save and send it straight to your channel. The whole edit takes about 15 minutes once you know the timeline shortcuts. The AI Denoise is useful if your capture card introduces grain in dark scenes — it cleans that up without making faces look waxy.
Suits casual creators who want a timeline without learning a pro NLE
This version suits three types of Mac users:
- Casual content creators who edit a few videos per week and don't want to learn a professional NLE like DaVinci Resolve or Final Cut Pro. Filmora gives you a timeline, effects, and export presets without the layered complexity.
- Users on older macOS versions (10.14 through 10.15) who cannot upgrade to the latest operating system. Filmora's compatibility extends to Mojave, so a 2014 iMac or a 2016 MacBook still runs current editing software.
- Multilingual teams or creators who work in Russian, Arabic, or Korean. The interface covers 16 languages including those, so you don't have to switch the system language to get a native-UI editor.
Set your default export preset to match your most common destination
When you open Filmora for the first time, three settings will save you time:
- Output format – Set your default export preset to match your most common destination. If you upload to YouTube, choose the YouTube preset. If you save local files, MP4 H.264 at 1080p is the safe default.
- Autosave interval – Enable project autosave and set it to every 5 or 10 minutes. Filmora projects store your cuts and effects, so a crash costs only a few minutes of work rather than a whole session.
- Timeline snap – Turn on snap-to-clip edges. This makes it easier to align cuts exactly at the boundaries between clips, which speeds up rough cuts significantly.
Beyond those, the default layout works fine for most workflows. If you work with multiple audio tracks, enable the audio waveform display on the timeline — that helps when aligning voiceovers to video cuts.
What the latest versions changed in everyday use
Version 14.8.10 introduced AI Denoise improvements and NewBlueFX optimization. Version 14.8.17 carries those forward without additional listed changes. In practice, that means the denoise tool is more selective about what it removes — it reduces grain without blurring fine details like hair or grass as aggressively as earlier builds. The NewBlueFX optimization shows up when you apply multiple transitions in a row; the timeline preview stutters less during scrubbing, and the final render completes without the occasional freeze that happened in version 14.5 and earlier. For someone who applies effects to every clip, that's a tangible improvement in daily use.
The export pipeline also feels more consistent. Earlier 14.x versions sometimes produced slightly different color in the exported file compared to the preview. That issue appears resolved in the 14.8.x branch, though the release notes do not call it out explicitly. The result is a more predictable workflow: what you see in the preview window is what you get in the final MP4.
What to expect on your Mac
Filmora requires macOS 10.14 or later and runs on both Intel and Apple Silicon. On a Mac with an M1 or M2 chip, the app launches in a few seconds and the timeline responds instantly during basic cuts and trims. The AI Denoise feature processes clips faster on Apple Silicon because it can use the Neural Engine, but Intel machines still handle it — expect the progress bar to take longer on a 2017 iMac or an older MacBook Pro.
It does not install background services or kernel extensions, so it won't interfere with other editing tools you have installed. The disk image mounts cleanly, you drag the app to Applications, and it works. No hidden dependencies or system modifications.
On a Retina display, the interface scales properly. The timeline, preview window, and effect panels look sharp at native resolution. On a non-Retina external monitor, the text and icons remain readable, though the effect thumbnails look slightly softer — that is expected for any video editor on a standard-resolution display.
Scenario: a freelance videographer editing client interviews
You shoot 45-minute interviews for a corporate client. The raw footage comes from two cameras: a main angle and a close-up. You import both into Filmora, sync them on the timeline by matching the audio waveform, then cut between angles to hide jump cuts. The client wants lower-third titles for each speaker and a logo overlay in the corner. You add those using the text tool, adjust the duration to match each speaker's introduction, and export a single 4K MP4 file for review.
For this kind of work, the autosave feature matters more than any effect. A 45-minute interview project with two video tracks and two text tracks takes time to set up. The snap-to-clip edges also help here: you align the cut points between the two camera angles precisely, and the snap feature keeps you from accidentally leaving a one-frame gap.
The AI Denoise is less useful in this scenario because interview footage is usually shot with controlled lighting. But if the client provides archival clips with visible grain, you can apply denoise selectively to those clips without affecting the clean footage.
Which kinds of Mac users get the most out of it
Filmora 14.8.17 works well for three groups of Mac users:
- Creators on older hardware – If you still use a Mac from 2014 to 2018, Filmora runs on macOS 10.14 through 10.15. That keeps you on a current editor without forcing an OS upgrade that your machine may not support.
- Users who edit in non-English languages – The 16-language interface includes Russian, Arabic, Korean, and Japanese. For teams where the primary language is not English, having the UI in your own language reduces errors and speeds up onboarding.
- Editors who need a predictable export – If your work goes directly to YouTube, Vimeo, or social platforms, the built-in export presets match those services' recommended settings. You do not need to calculate bitrates or frame sizes manually. That saves time for editors who deliver multiple videos per week.
Wondershare Filmora provides an accessible video editing suite for beginners and intermediate creators. The filmora mac torrent version follows the same installer process and supports the same macOS versions. If you search for a wondershare torrent for video editing, this build is a good candidate because it runs on both architectures and includes the AI Denoise improvements.
- No version-specific changes were stated for 14.8.17 in the provided sources.
- macOS 10.14 or later
- Architecture: both Intel and Apple Silicon
Install procedure
- Mount the disk image and drag the app into the Applications folder.
- Open the app and quit it once it finishes launching.
- The app is ready to use.
Reports from players
Sign in or create a tester account to file a report.
No reports filed yet.