
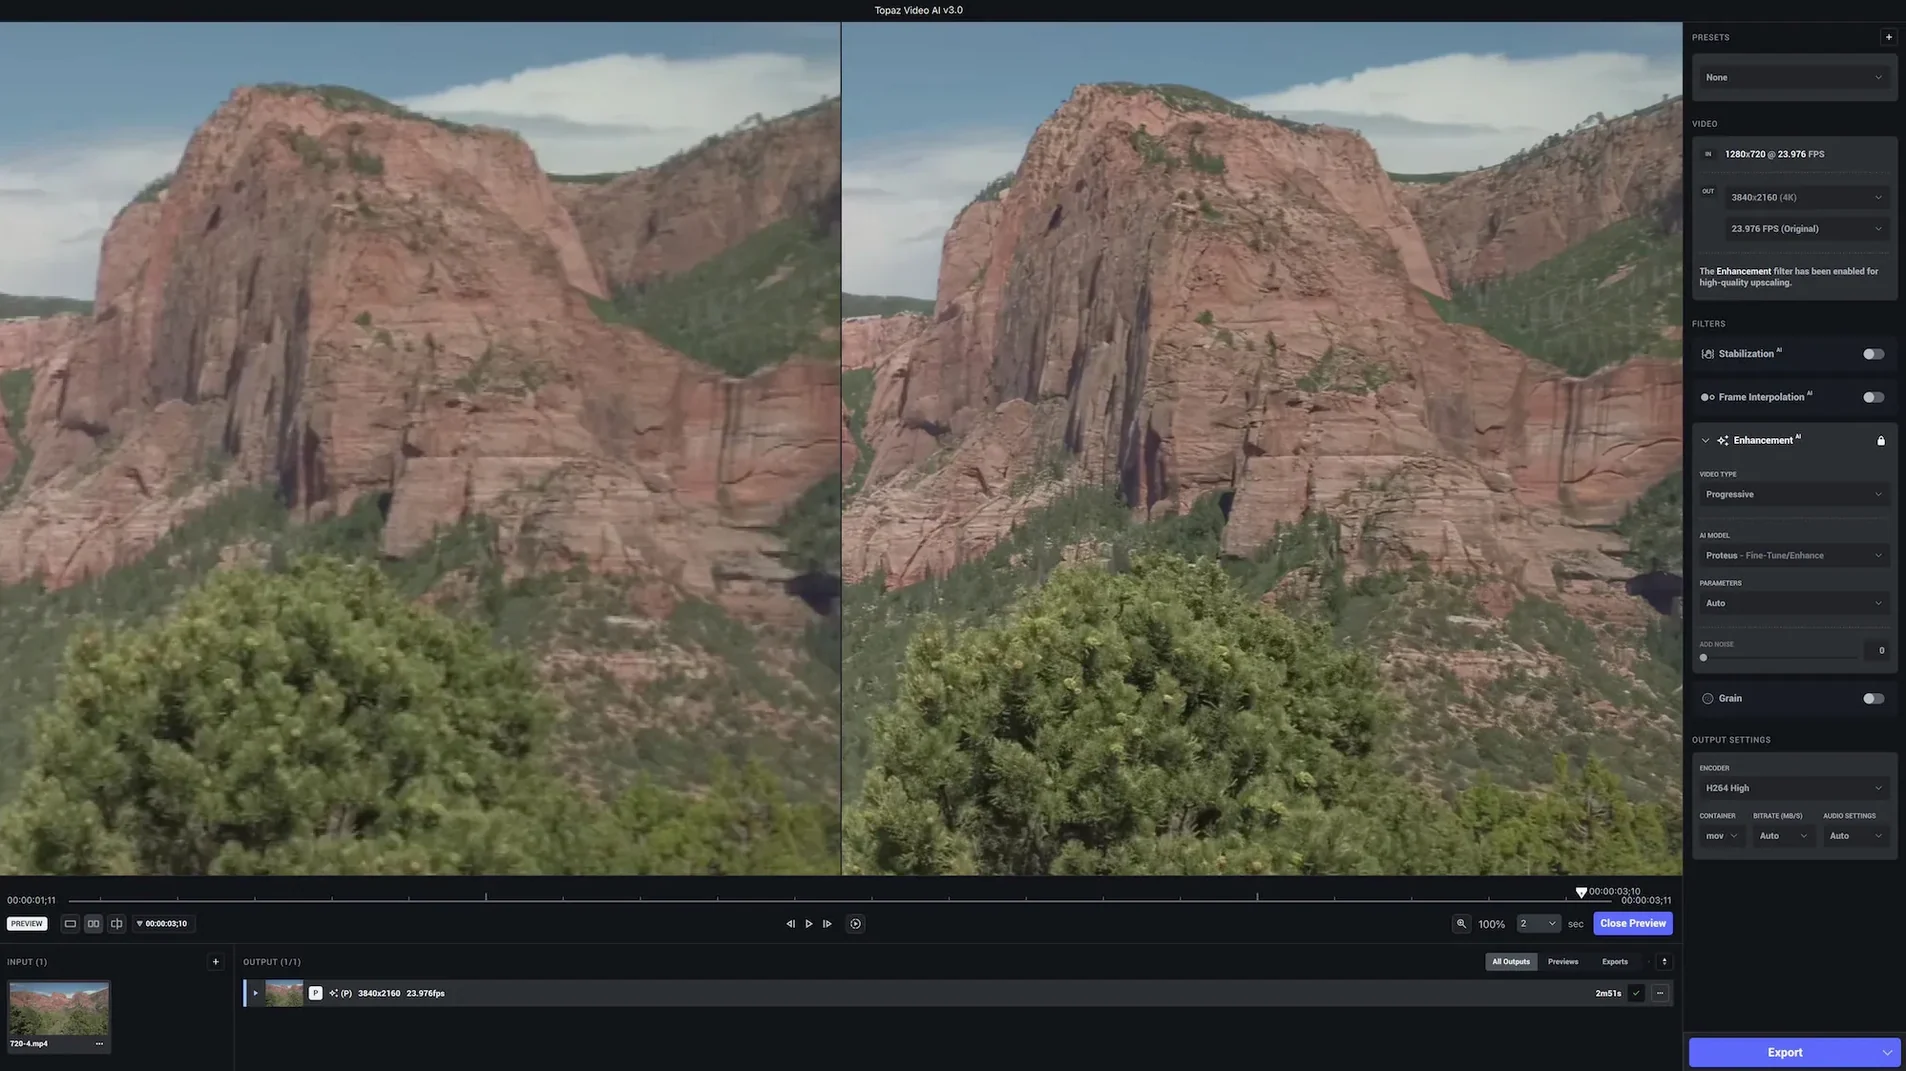
You have a clip that looks soft, noisy, or jerky. Opening it in Topaz Video AI on a Mac running macOS 11 or newer, you pick a model, hit export, and wait. It also stabilizes shaky footage. The interface is English, and the app runs on both Intel and Apple Silicon Macs.
Start with a short SD clip and Proteus
Start with a short SD clip and the Proteus model. Proteus handles upscaling and denoising together, which covers the two most common problems. Set the output resolution to 1080p or 4K and watch how the AI recovers edges and removes grain. The app generates new in-between frames, making motion smoother without the soap-opera effect that simple blending produces.
Stabilization and focus
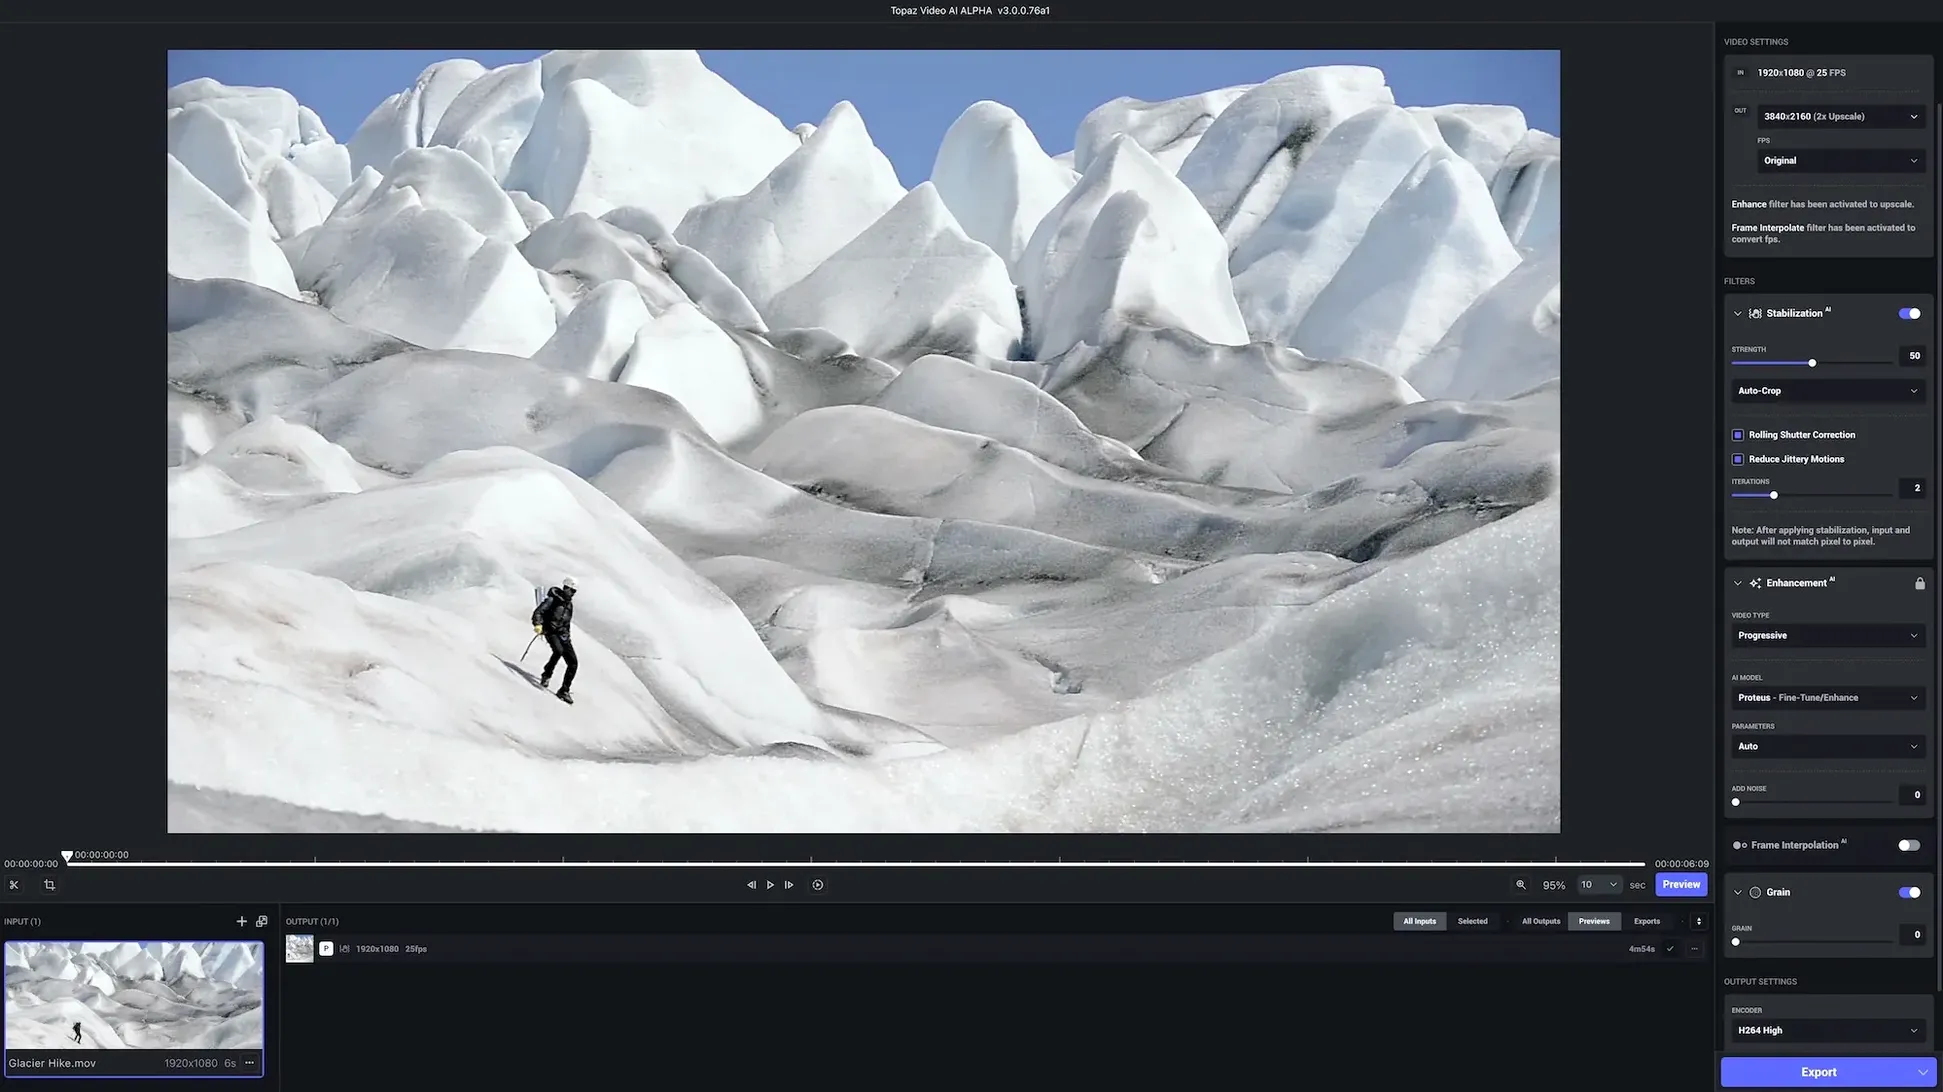
If the source is handheld, run it through the stabilization model. It works best on footage with moderate shake; severe motion may need cropping afterward. For clips that look slightly out of focus, try the deblur model. It recovers detail that ordinary sharpening cannot reach. The models are applied per clip, so you can stack them: stabilize first, then upscale and denoise. Export settings let you choose codec and bitrate, so test a short segment before processing a full project.
M-series chips use Neural Engine and GPU cores together
Topaz Video AI relies on the GPU for its AI model inference. On Apple Silicon Macs with unified memory, the M-series chips process models like Proteus and Gaia using the Neural Engine and GPU cores simultaneously. Intel-based Macs with discrete AMD graphics also work, but expect longer export times on complex 4K upscales. The app requires macOS 11 or later and runs natively on both architectures — no Rosetta translation needed on Apple Silicon.
Each model processes frames sequentially. Higher output resolutions (4K to 8K) increase processing time linearly. The app does not support batch processing multiple clips in a single queue in version 1.7.1, so you export one file at a time. The export dialog lets you choose between MP4, MOV, or ProRes containers. For archival work, ProRes retains the most quality for further editing. For delivery or web upload, H.264 at a moderate bitrate keeps file sizes manageable.
The application stores processed frames temporarily on disk. If you have limited free space, process shorter segments. The app does not cache models between sessions, so the first run after launch loads model weights into memory again — expect a short wait before preview playback starts.
Topaz Video AI outputs standard files for any NLE
Final Cut Pro’s built-in tools
Final Cut Pro includes basic stabilization, de-noise, and sharpening effects, but relies on standard algorithms rather than AI. For light cleanup on modern footage, Final Cut works fine. For restoring old SD video, recovering focus, or upscaling to 8K, Topaz Video AI produces noticeably cleaner results because its models are trained on specific artifact patterns. Final Cut cannot generate new frames for frame-rate conversion — it only blends or duplicates existing ones.
DaVinci Resolve’s Neural Engine
DaVinci Resolve (version 17 and later on Mac) includes AI-based facial recognition, object tracking, and basic upscaling through its Super Scale feature. Super Scale works well for 1080p to 4K, but maxes out at 4X scaling. Topaz Video AI supports up to 8K output and offers more specialized models: separate ones for denoising, deblurring, stabilization, and grain removal. DaVinci’s strength is its full color grading suite, while Topaz stays focused on video enhancement alone. For a workflow that needs both, you can export an enhanced clip from Topaz and import it into DaVinci for color grading.
DVDFab Enlarger AI
DVDFab offers a similar AI upscaling tool for Mac, but its model support is narrower — it targets mainly DVD and SD content. Topaz Video AI includes models trained on DSLR, game capture, and film grain footage. DVDFab also lacks separate stabilization and frame interpolation features, making Topaz a more complete solution for varied source material.
Export as ProRes for Final Cut, Resolve, or Premiere
Topaz Video AI outputs standard video files, so it fits into any Mac editing workflow without proprietary formats. Export as ProRes to bring into Final Cut Pro, DaVinci Resolve, or Adobe Premiere for further editing. The app does not support plug-in integration — you cannot run it as a filter inside another NLE. You process clips separately, then import the results.
On macOS, you can use Automator or Shortcuts (macOS Monterey and later) to rename exported files automatically. For example, set up a folder action that watches your Topaz export folder and renames files by date and model name. The app does not include AppleScript support, so deeper automation requires third-party tools like Keyboard Maestro to trigger exports from a single hotkey.
The app respects macOS color profiles. If you work in a color-managed workflow (such as Rec. 709 for broadcast or P3 for HDR), the exported file retains the source color space — no unexpected gamut shifts. Test a short clip first if you need strict color accuracy.
Workflow: restoring a shaky, low-light SD clip to 1080p
- Open Topaz Video AI and drag the SD clip into the window. The preview pane loads the first frame.
- Select the stabilization model from the model dropdown. Let it process a few seconds so the preview shows the stabilized result. If the crop area looks too aggressive, switch to the less aggressive "Stabilize – Mild" preset.
- After stabilization, add the "Gaia" model for upscaling. Set output resolution to 1080p. Gaia handles sharpening and detail recovery better than Proteus when the source is already stabilized.
- Enable the denoising model if the clip was shot in low light — low-light SD footage often has color noise. Choose "Denoise – Medium" to reduce grain without wiping out texture.
- In the export settings, select ProRes 422 as the codec for editing. Set bitrate to "Automatic." Name the file with the project name and date.
- Click Export. Processing time depends on the clip length and your Mac’s GPU. A 30-second SD clip at 1080p takes noticeably less time than a full 4K upscale.
- When export finishes, open the ProRes file in your NLE. The clip is stabilized, upscaled, and denoised — ready to color grade and mix with other footage.
Set output resolution to 1080p or 4K, not source default
- Output resolution preset: The default may match the source. For most work, set it to 1080p or 4K explicitly. If you plan to edit in a timeline, match the project resolution to avoid an extra scaling step.
- Preview quality: Lower it from "High" to "Medium" during the model selection phase. The preview updates faster, letting you compare models without waiting for full-resolution rendering. Switch back to "High" before final export to verify results.
- Frame interpolation type: The default is "Flow" for smooth motion. If you process old archival footage with frame drops, switch to "Flow – Motion Boost" to generate more frames. For film-to-video transfers, "Flow – Slower" avoids artifacts on pans.
- Export format: ProRes is the safest choice for further editing.
- Model selection: Do not run every model at once. Test each model separately on a 5-second clip.
- macOS 11 or newer
- Intel or Apple Silicon processor
Questions from the notes
What macOS version does Topaz Video AI require?
Topaz Video AI works on macOS 11 and newer. It supports both Intel and Apple Silicon Macs.
Install procedure
- Install TopazVideo.pkg first.
- Open Patch.command and enter your Mac password when prompted.
- If Patch.command fails to open correctly on macOS Golden Gate, right-click it and select Open from the context menu.
Reports from players
Sign in or create a tester account to file a report.
No reports filed yet.