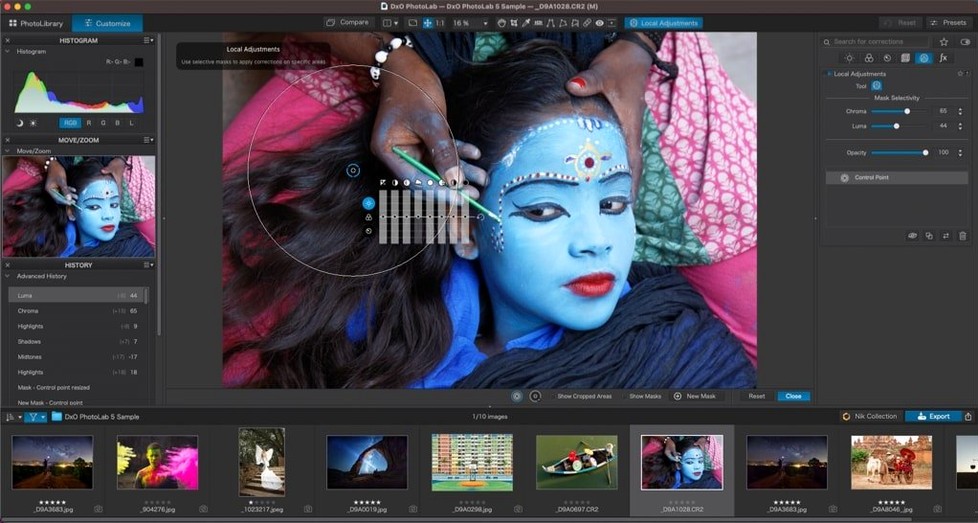
DxO PhotoLab 9.10.0 works on any Mac running macOS 14.7 or later, whether it has an Intel chip or Apple Silicon. That covers a broad range of machines, so compatibility is rarely the issue. Once it's installed, here are the first things to try.
What is the first thing to test?
Open a RAW file and apply DeepPRIME XD3. It's the tool that separates this editor from simpler ones — it combines demosaicing and AI-based noise reduction in one pass, which is especially useful for high-ISO shots.
How do I handle lens distortions?
DxO PhotoLab uses DxO Modules, which are built from actual measurements of camera and lens combinations. When you import a photo, optical corrections apply automatically. You can then take manual control and adjust any of those automated corrections.
What about local edits?
Copy and paste local adjustments between images to keep the look consistent across a series. And if you shoot in Apple's HEIC, HEIF, or ProRAW formats, the software reads them directly, so you don't need to convert first.
Start by importing a mixed set of RAWs
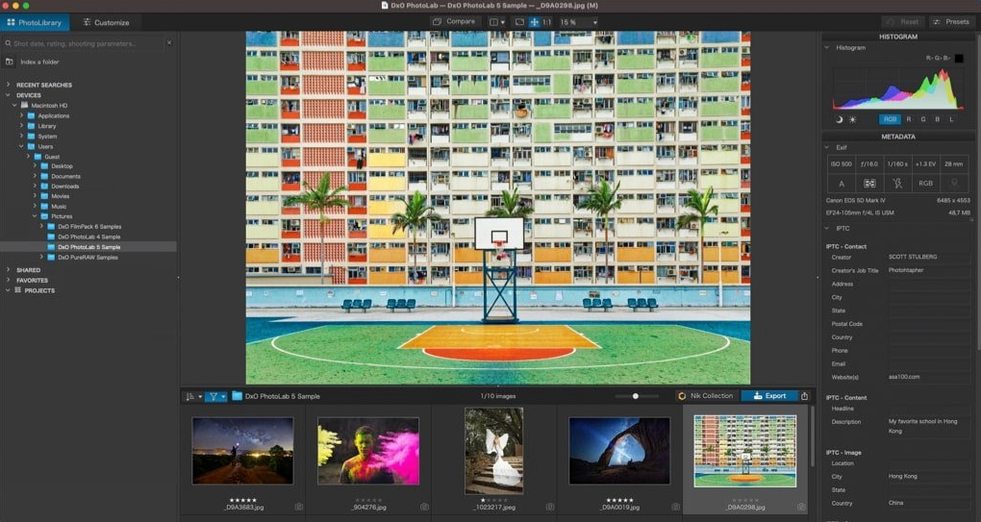
The first few sessions with DxO PhotoLab are about figuring out which of its corrections you want automatic and which you want to set by hand. A good starting point: import a mixed set of RAWs — some well-lit, some high-ISO, some with obvious lens distortion. Let the DxO Modules apply optical fixes automatically, then toggle each correction off and on to see what was changed. That gives you a sense of the baseline the software establishes before you touch anything.
Next, try the noise reduction tools on the same photo. Compare DxO PRIME, DeepPRIME, and DeepPRIME XD3. The differences are clearest on shots taken at ISO 3200 or higher. For Bayer and X-Trans sensors, DeepPRIME XD3 does the most aggressive job, but not every image needs that level of processing. A well-exposed ISO 800 file might look just as clean with standard DeepPRIME, and the processing time is shorter.
DxO Smart Lighting and DxO ClearView are worth testing on a few backlit or hazy photos. Smart Lighting lifts shadows without blowing highlights, which is useful for scenes with high contrast. ClearView works like a dehaze tool, cutting through atmospheric haze in landscape shots. Neither is a one-click fix for every situation, so try them at different strength settings to learn where they help and where they overshoot.
Using AI masks early on
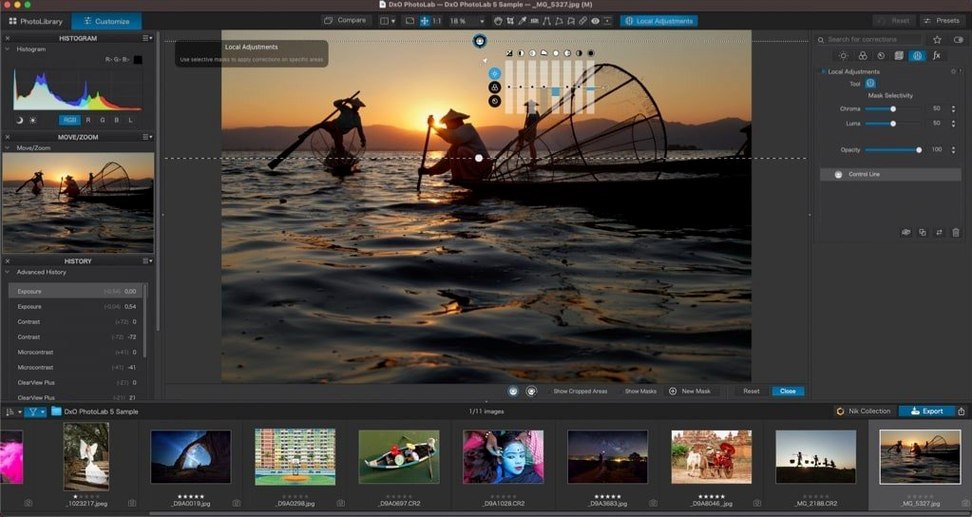
AI Masks for subjects like skies, people, backgrounds, and animals are one of the quicker ways to learn the local adjustment workflow. Apply a sky mask, then adjust exposure or contrast only in the sky area. The mask boundary won't be perfect on every photo — complex edges like tree branches can confuse it — but you can refine the mask manually. Once you get a mask right, save it and apply it to similar shots using the copy-and-paste feature for local adjustments.
Shooters with multiple camera bodies benefit most
Photographers who shoot a lot of RAW files with different camera bodies benefit the most. The DxO Modules library covers over 600 cameras, so lens profiles and sensor corrections are available without needing to create them yourself. If you switch between a Sony and a Fujifilm body regularly, the software handles both without separate calibrations.
People who need consistent edits across large batches will also find it useful. The synchronization of edits using quick-select Subject Types lets you apply the same local adjustments to dozens of photos at once. That saves time when you're working through event coverage or a set of portraits shot under identical lighting.
Mac users who work with Apple's HEIC, HEIF, and ProRAW formats get direct file support. No conversion step is needed before you start editing, which is convenient if you use a recent iPhone or iPad as a secondary camera and want to keep the whole workflow inside one app.
Dial back aggressive default vignette corrections
The most common problem people hit is assuming every correction should stay at its default strength. DxO Modules apply optical corrections automatically, but the default amount is not always the best amount. If a vignette correction looks too aggressive, dial it back. If the noise reduction smooths out fine detail, lower the strength or switch from DeepPRIME XD3 to standard DeepPRIME.
Another snag: AI Masks not detecting the right area on the first try. This happens most often with skies that have thin clouds or animals in complex backgrounds. The workaround is to generate the mask, then use a brush to add or remove parts of it manually. The manual refinement takes a few seconds, but it's faster than masking the whole area from scratch.
Some users report not seeing DxO Modules for their specific lens. The modules are based on lab measurements, so a newer lens might take a while to be added. In that case, the software still applies generic corrections, but you may need to adjust them manually. Checking the DxO Labs site for updates can confirm whether a module exists yet.
Copying local adjustments between images can fail if the two photos have different aspect ratios or were shot with different lenses. The adjustments transfer, but the positioning might be off. The sync feature for Subject Types works better in that scenario because it re-detects the subject on each image rather than pasting coordinates.
Labs-measured lens profiles give it an edge over Lightroom
Adobe Lightroom Classic handles RAW files and offers similar catalog management, but its noise reduction is not based on lab-measured lens profiles. DxO PhotoLab's DxO Modules give it an edge when you need optical corrections that match a specific camera-lens combination. Lightroom's AI masking is more mature in some areas, but DxO's DeepPRIME XD3 produces cleaner results on high-ISO Bayer and X-Trans files in my experience.
Capture One is another strong competitor, with excellent color grading tools and tethering support. It does not have the same automated lens correction library though, and its noise reduction is less aggressive than DeepPRIME XD3. Capture One's session-based workflow appeals to studio photographers who shoot tethered, but for someone who mostly imports memory cards and wants automatic fixes first, DxO PhotoLab requires fewer manual steps.
ON1 Photo RAW includes AI-based masking and noise reduction, but its optical corrections rely on generic profiles rather than measured DxO Modules. The difference shows in edge-to-edge sharpness after lens correction. ON1 also has a layered editing model, which is useful for compositing, whereas DxO PhotoLab focuses on a single-image RAW pipeline with selective adjustments rather than full layers.
- macOS 14.7 or later
- Intel or Apple Silicon
Questions from the notes
Which macOS versions does DxO PhotoLab 9 support?
It runs on macOS 14.7 or later, and supports both Intel and Apple Silicon Macs.
What does DeepPRIME XD3 do?
DeepPRIME XD3 combines demosaicing and AI-based noise reduction for Bayer and X-Trans sensors, improving detail and reducing noise.
Can I adjust auto corrections manually?
Yes, DxO PhotoLab gives you manual control over the automated corrections, including optical fixes and DxO Smart Lighting.
Install procedure
- Open the included installation package.
- Start the installer from inside the package.
- Click Next in the welcome dialog.
- Drag the app icon to the Applications folder.
- Launch the app from the Applications folder.
- Read and accept the license agreement to continue.
Reports from players
Sign in or create a tester account to file a report.
No reports filed yet.